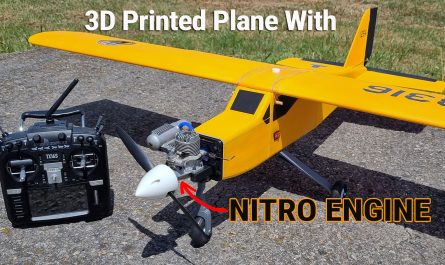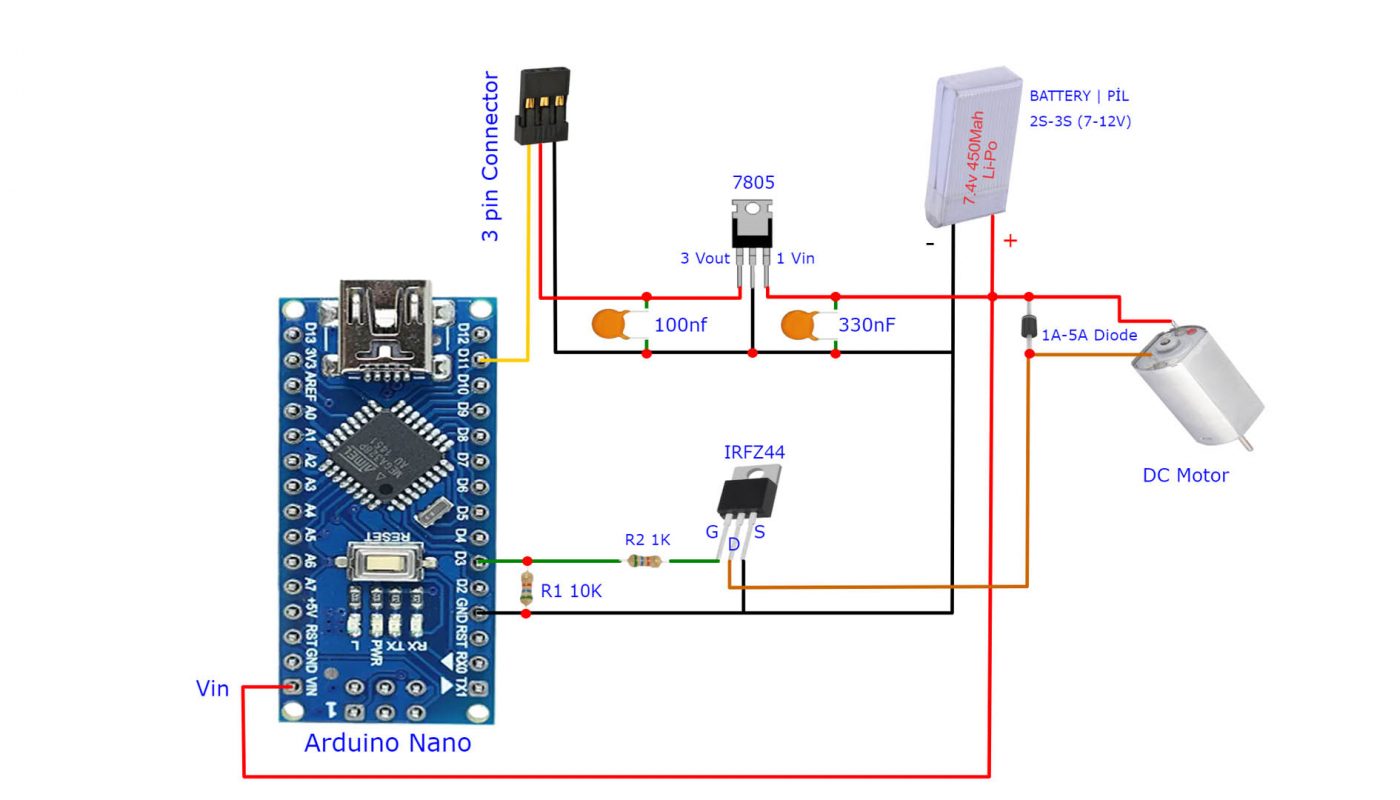
How To Make 18A Brushed Electronic Speed Control. DIY 18A ESC
Materials:
Arduino Nano (Klon): https://www.banggood.com/custlink/GKKvzk46ms or https://www.banggood.com/custlink/vvmGqU4eG7
IRFZ44 N Channel Mosfet: https://www.banggood.com/custlink/DvKv2q043S
10K resistor and 1K Resistor : https://www.banggood.com/custlink/DKDK2qgByS
1A or 5A Diode (1A diode is enough for a motor that draws 4-5A as in the video)
https://www.banggood.com/custlink/GvKGqq6gdO or https://www.banggood.com/custlink/mGD32kg0dn
7805 5V regulator IC: https://www.banggood.com/custlink/KmGvkU4BRU
Mini Heatsink: https://www.banggood.com/custlink/KK3vkq0BRu
JST conectors & cable (Male and Female): https://www.banggood.com/custlink/vm3GUM4BCC
PCB Board: https://www.banggood.com/custlink/3vGmz3yNqC
100nf (0.1uF) capacitor: https://www.banggood.com/custlink/KmKm2Me4JM
330nF (0.33uF) capacitor: https://bit.ly/2xgfTwU
Servo extension cable: https://www.banggood.com/custlink/GvGmUM7Z2w
Other Materials:
Wire Stripper Crimper: https://www.banggood.com/custlink/DGDGkkggvF
2S 7.4V 450Mah LiPo Battery: https://www.banggood.com/custlink/KKKGU3EqE3
Lipo Battery Charger: https://www.banggood.com/custlink/Kv3GeU1627
DC 180 Motors (39000 RPM): https://amzn.to/35rD8Ar or bit.ly/2L62JqC
108mm Propellers (CW&CCW): bit.ly/33MPMbY
Arduino Code For Brushed ESC :
// Brushed Electronic Speed Control | Fırçalı Elektronik Hız Kontrol (ESC)

void setup() {
 pinMode(11, INPUT);  // Receiver Throttle Signal Input| Alıcı Gaz Kanalı Sinyal Girişi
 pinMode(3, OUTPUT); //  Mosfet Gate Output Pin | Mosfet Gate Çıkış Pini
}

void loop() {

   analogWrite(3, map(pulseIn(11, HIGH), 1000, 2000, 0, 255)); // map received value to arduino pwm range (for normal radio control system) | Normal kumanda sistemleri için PWM aralığı harita değerleri
// analogWrite(3, map(pulseIn(11, HIGH), 1095, 2000, 0, 255)); // map received value to arduino pwm range (for hand made arduino radio control system) | Arduino ile el yapımı kumanda sistemleri için PWM aralığı harita değerleri

delay(15);
}
Note: The first value in the map command, “1000”, determines the signal start value. This may be different for some transmitters. You may need to try between 800 and 1150 values.
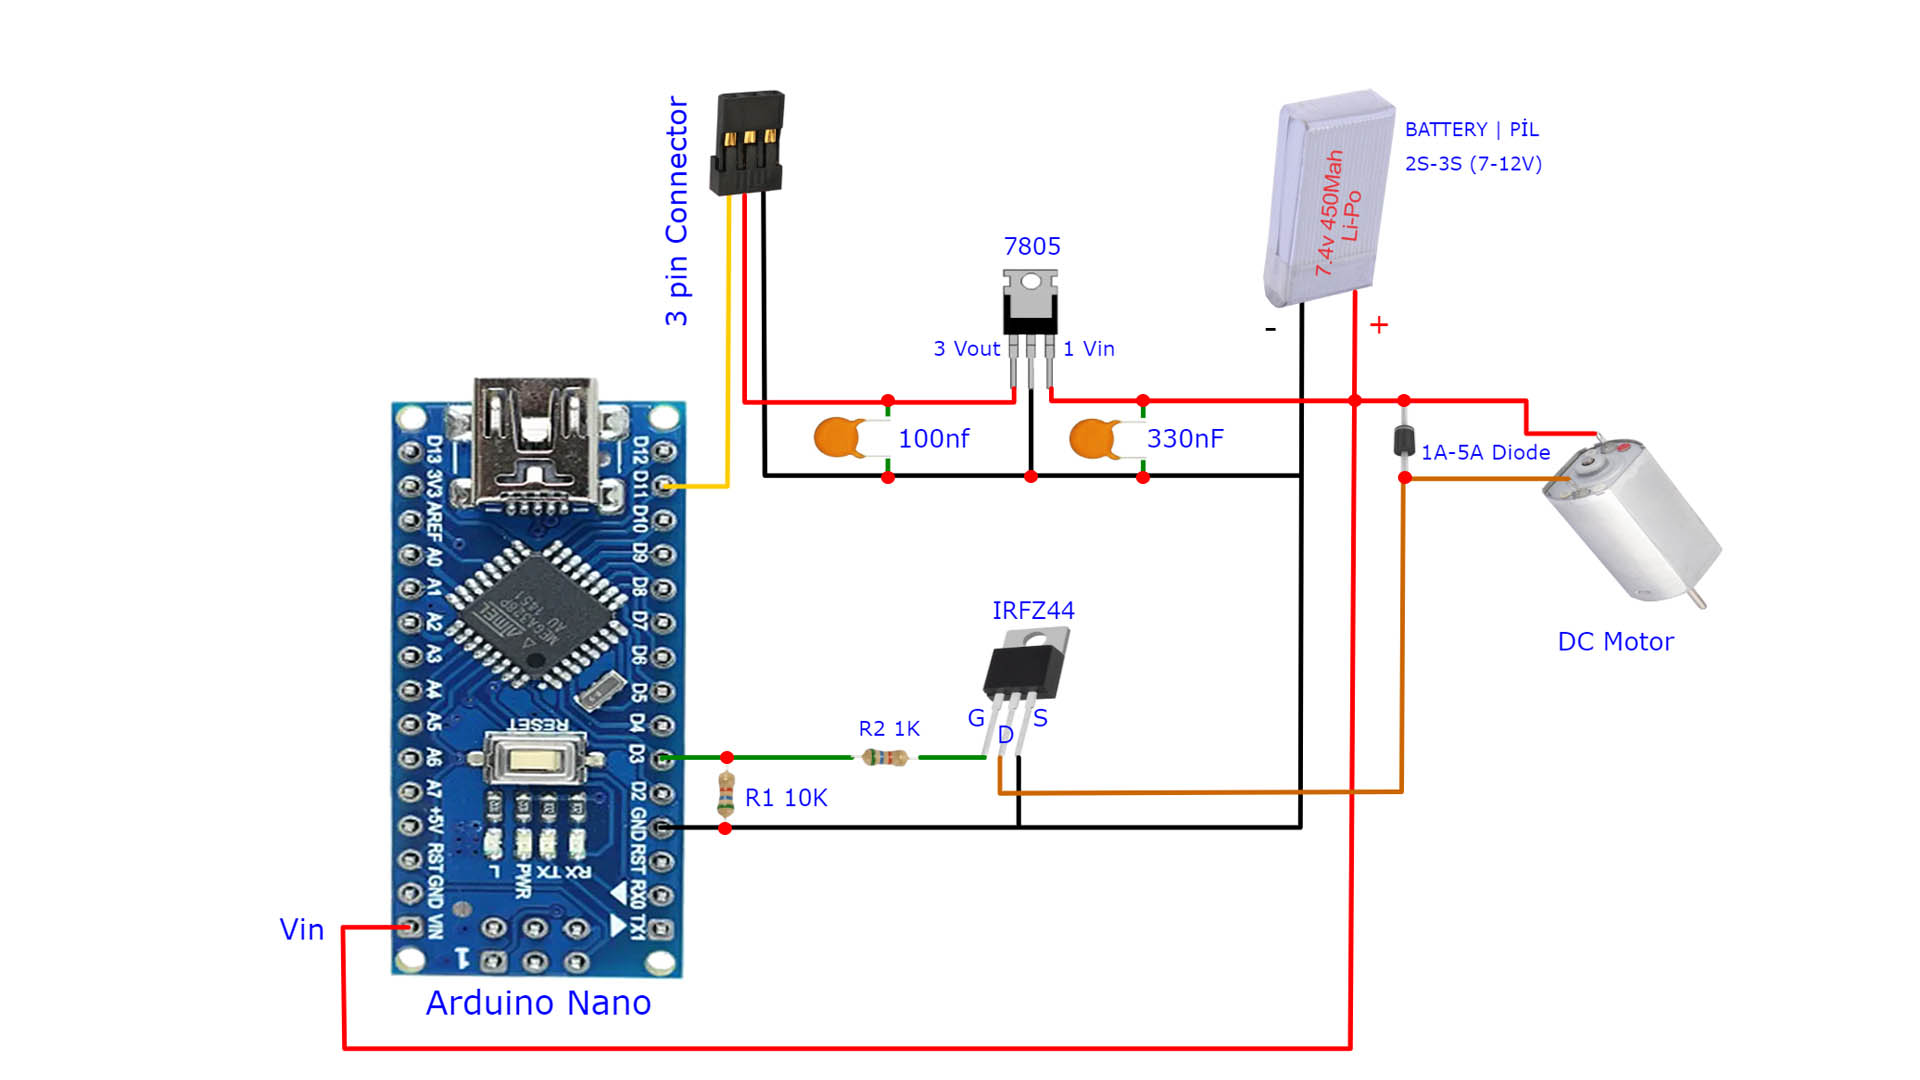
The diode value in the motor connection section is related to the current power drawn by the motor. For small low-power motors, 1A is sufficient. But for much larger motors, 5A may be required.
The function of the diode: When the power to the motor is cut off, the energy accumulated in the coil is transmitted back to the circuit. This can damage the circuit. The coil prevents reverse voltage and protects the circuit.