Arduino Pro Mini Programming with Arduino UNO
There are two ways to program the Arduino Pro Mini. One is to use USB TTL converter and the other is Arduino UNO or Nano. UNO and NANO are used with the same logic. Here I used Arduino UNO, the most common card and method to explain the subject.
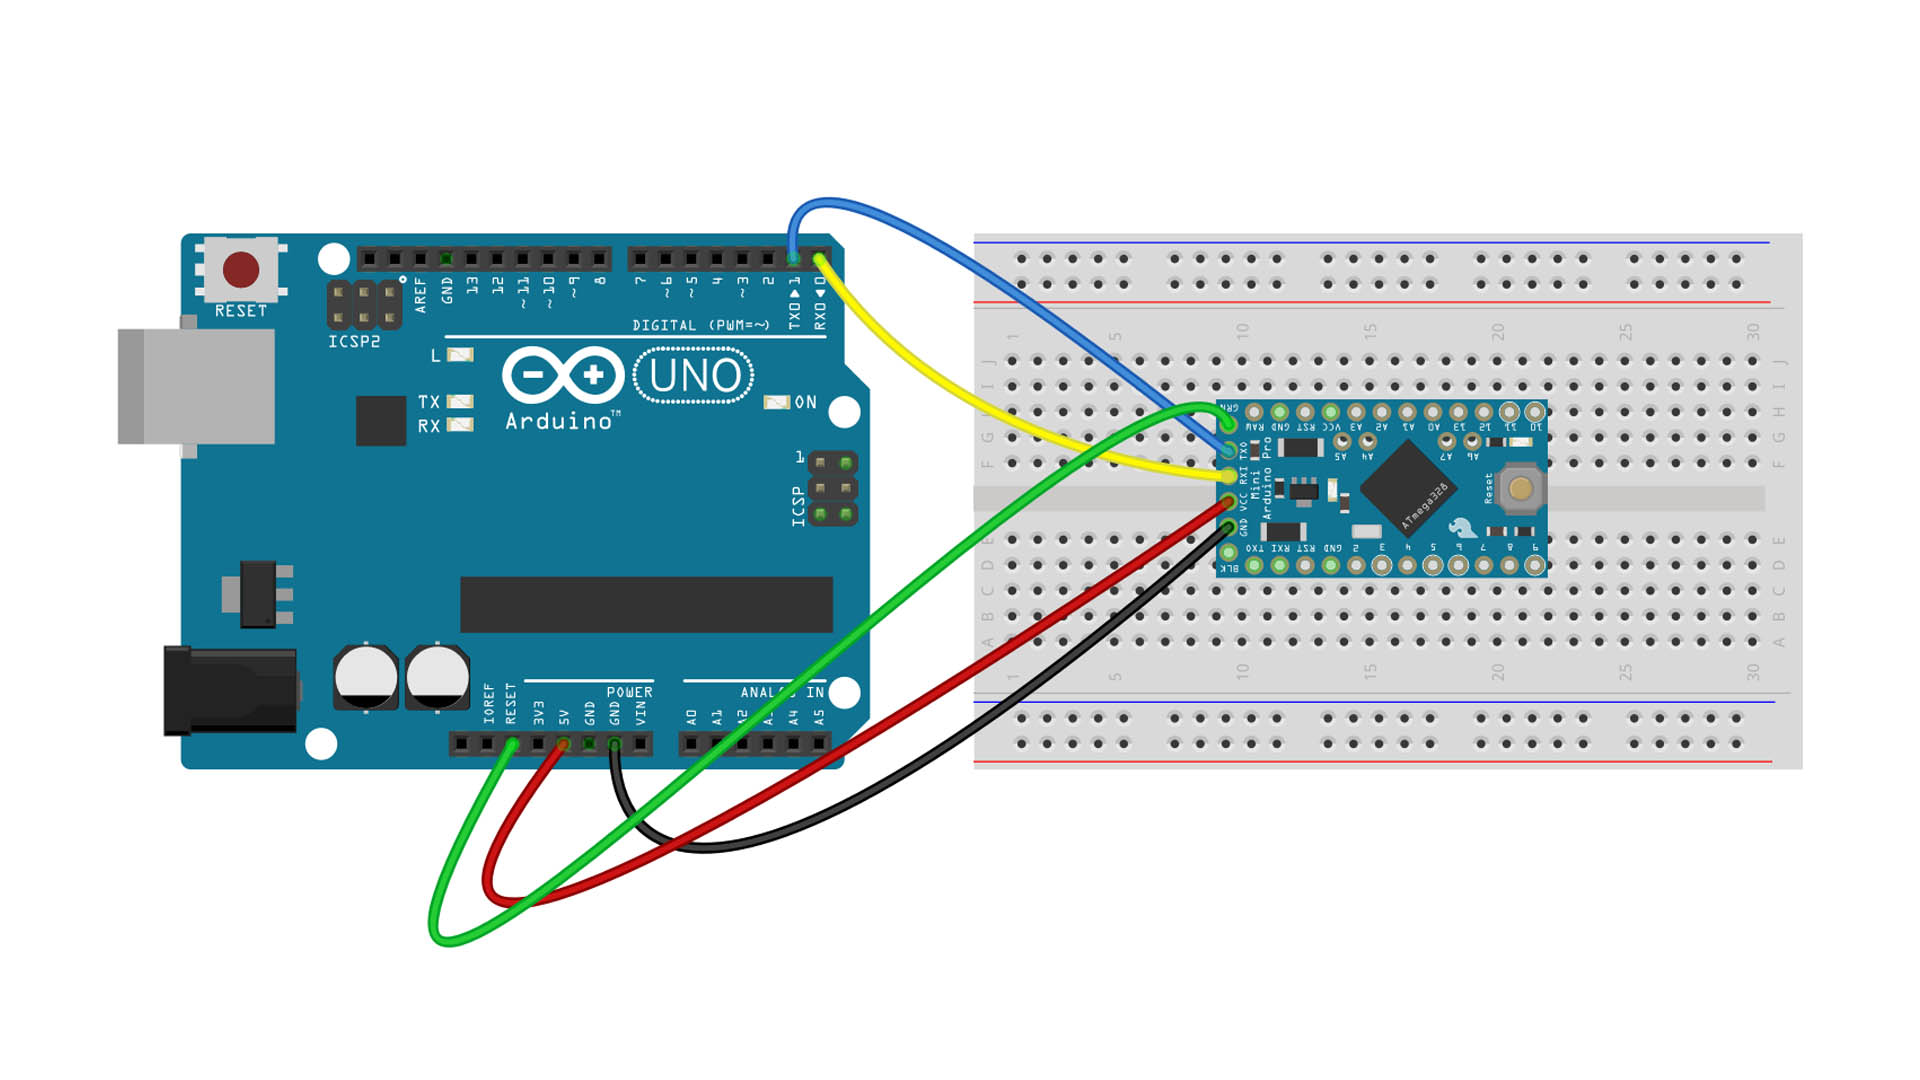
Arduino Uno – Pro Mini Connections
| Mini Pro | Arduino UNO |
| GND | GND |
| VCC | 5V veya 3.3V (Karta Göre) |
| RXT | RX |
| TXD | TX |
| DTR veya GRN | RESET |
If your Pro Mini board is 5V, you should use the 5V output on the UNO, if 3.3V, you should use the 3.3V output on the Arduino.
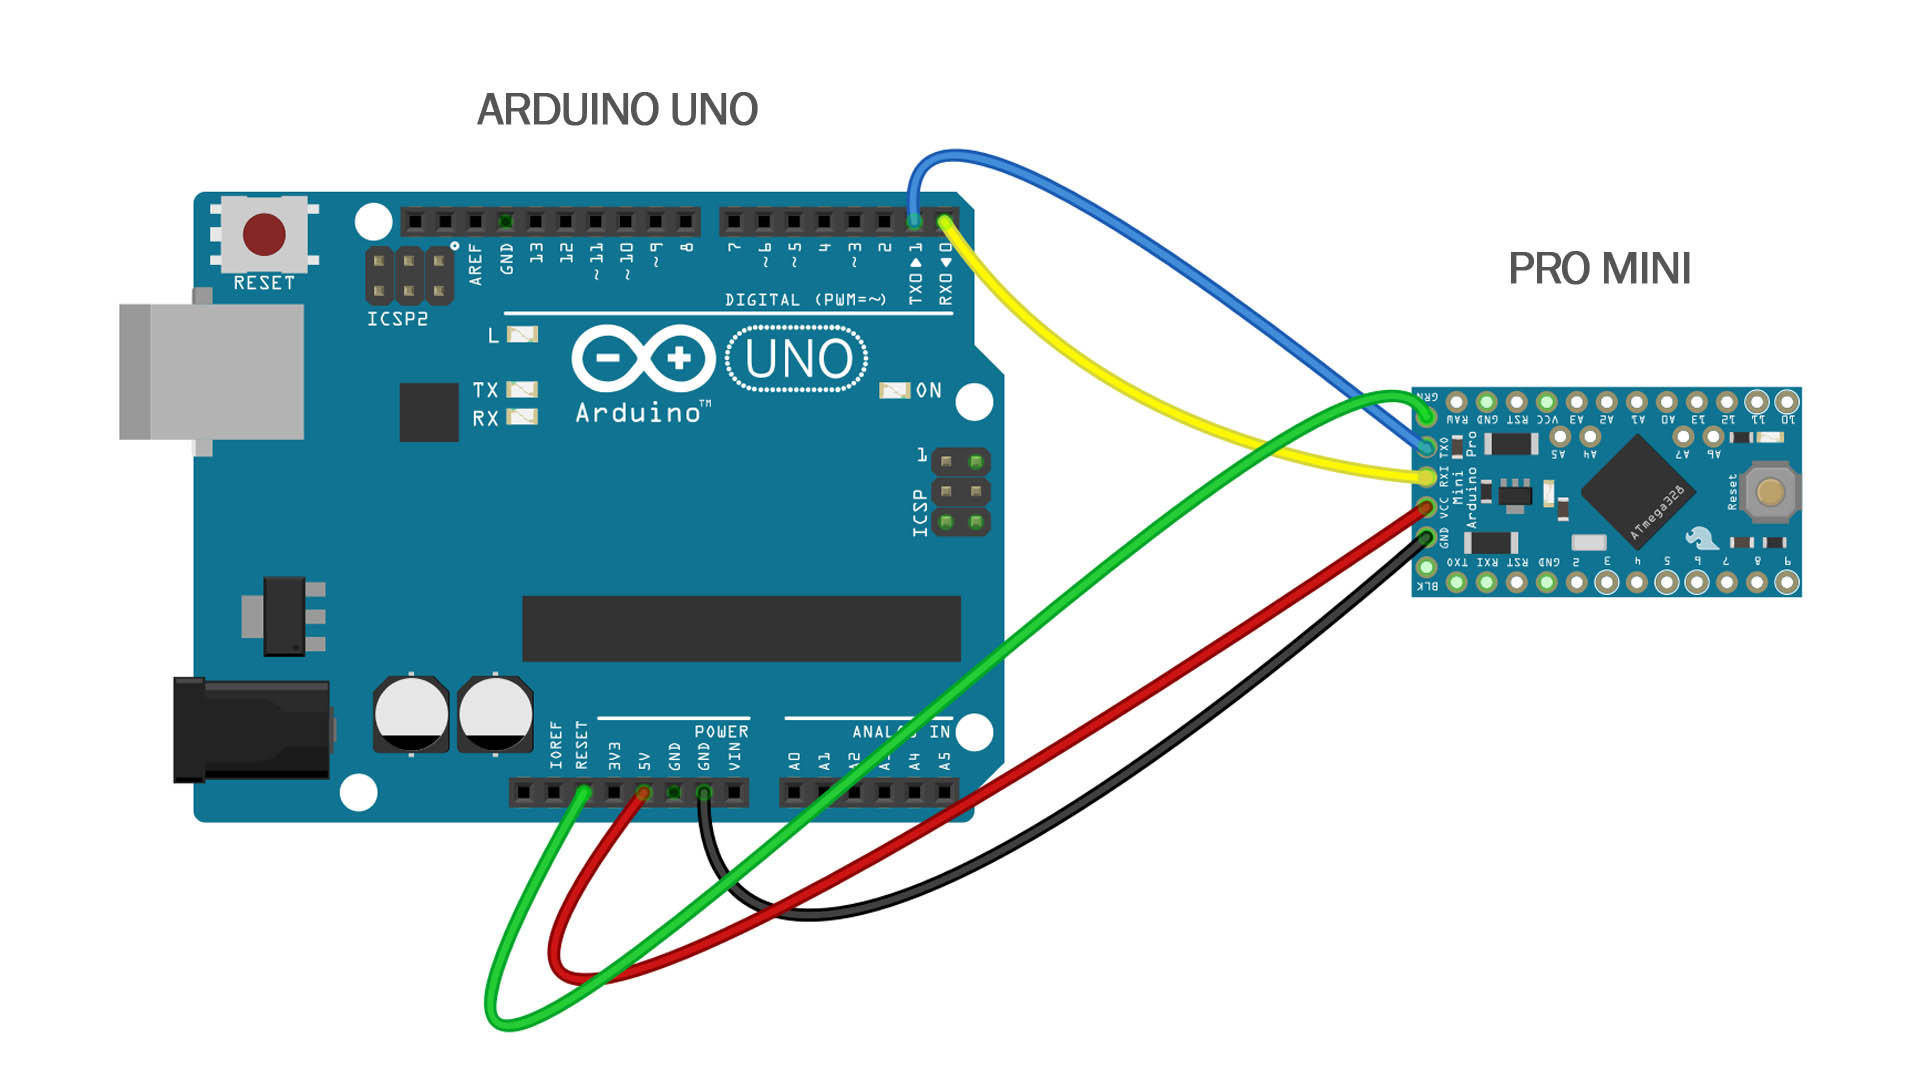
After making the connections
1- Select the Arduino Pro or Pro Mini board as the Board from the Tools menu.
2- Select the model of your card as Processor
3- Arduino UNO port connection should appear in the port section
4- Press the Load button
PROBLEM and SOLUTION: If you want to install your program on Arduino Pro Mini, the loading notification continues for a long time and if the program stk500_getsync () attempt and stk500_recv (): programmer is not responding error occurs and programming does not take place, you can fix the problem with the following method.
While holding down the reset button on the Arduino Pro Mini, press the “Install Button” on the screen. Immediately release the reset button when the “compile” message disappears and “Loading” appears in the warning section at the bottom of the window. The installation will be completed shortly.
ERROR MESSAGE ….

